Categories
Mold Remediation

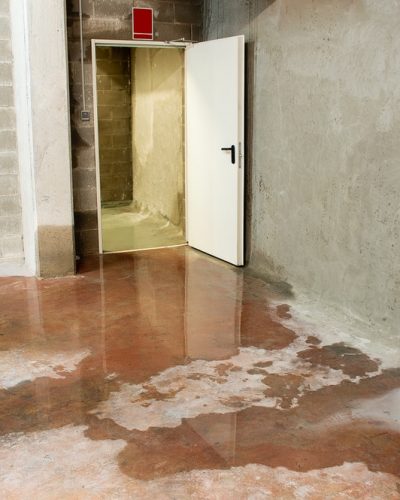
Basement Water Removal: Effective Techniques To Keep Your Home Dry

Often overlooked, basement water removal is a critical task that homeowners must address promptly to prevent extensive damage and health hazards. A flooded basement can lead to structural issues, mold growth, and expensive repairs.

Yeti Restoration — your leading expert in water damage restoration in Cincinnati — offers comprehensive solutions to keep your home dry and safe. We have the expertise and tools to handle flooded basement cleanup efficiently, ensuring a quick and effective restoration process.

This article will discuss the effective techniques for basement water removal to protect your property and loved ones.

Identifying the Cause of Basement Water Issues

Understanding the root cause of basement flooding is essential for effective water removal and prevention. Here are common causes of basement water issues:

  • Heavy Rainfall: Intense and prolonged rain can overwhelm your home’s drainage system. Rainwater can seep into the basement through cracks, gaps, and foundation walls.
  • Poor Drainage Systems: Inefficient drainage systems around your home can cause water to accumulate and infiltrate your basement. Clogged gutters, faulty downspouts, and improper grading can all contribute to basement flooding.
  • Foundation Cracks: Cracks in the foundation can provide easy access for water to enter your basement. They can appear from natural settlement, poor construction, or soil movement.
  • Broken or Leaking Pipes: Plumbing issues in pipes can quickly flood your basement, causing significant water damage. Aging pipes, frozen pipes, or clogs can all contribute to water leaks and flooding.
Basement Water Removal

Immediate Steps To Take for Basement Water Removal

Here are the immediate steps to take if you notice signs of basement flooding.

Act Fast

Quick action is crucial when it comes to basement water removal. Act fast to minimize damage and prevent mold growth. The longer you wait, the more damage can occur and the more challenging it will be to clean up.

Perform a thorough inspection of your basement and identify the source of the water. Assess the type of water present, the extent of the damage, and potential safety hazards before proceeding with the cleanup.

You want to ensure the insurance company will cover your losses. Many insurance companies will not cover the damage if the homeowner does not act quickly to minimize the damage worsening over time. 

Safety First

Water damage can pose safety risks. Turn off electricity in the affected area to avoid electrical hazards. Wear protective gear like rubber boots and gloves to protect yourself from contaminated water.

Do not risk your safety by entering the water, especially if you’re unsure of its origin. The best course of action is to contact a professional water damage restoration company like Yeti Restoration. When In doubt- call a Yeti! 

Initial Water Removal Methods

Failing to remove the water promptly can lead to mold growth and further damage. Here are some initial water removal methods you can use:

  • Using a Wet/Dry Vacuum: This tool effectively removes small amounts of water. Be sure to use a grounded extension cord and follow all safety guidelines.
  • Utilizing Submersible Pumps: These pumps are ideal for quickly removing large volumes of water. However, they require technical knowledge and caution when operating, so it’s best to leave this task to professionals. 
  • Absorbing Water With Towels and Mops: Use absorbent materials to soak up excess water in hard-to-reach areas until professional help arrives. Dispose of the towels and mops properly to prevent mold growth.

Effective Techniques for Flooded Basement Cleanup

After removing the standing water, it is essential to dry out your basement thoroughly. We see this often… a homeowner thinks it is “dry enough” and then starts to smell some mildew odors and see mold growth a week later and then calls us in to help. Please do yourself a favor and call a Yeti  right away. We have the tools to take moisture reading on all surfaces and will guide you in whether drying it yourself is a viable option. 

Here are some effective techniques for flooded basement cleanup that Yeti Restoration provides:

  • Water Extraction: We employ advanced water extraction techniques to remove standing water from your basement swiftly and efficiently.
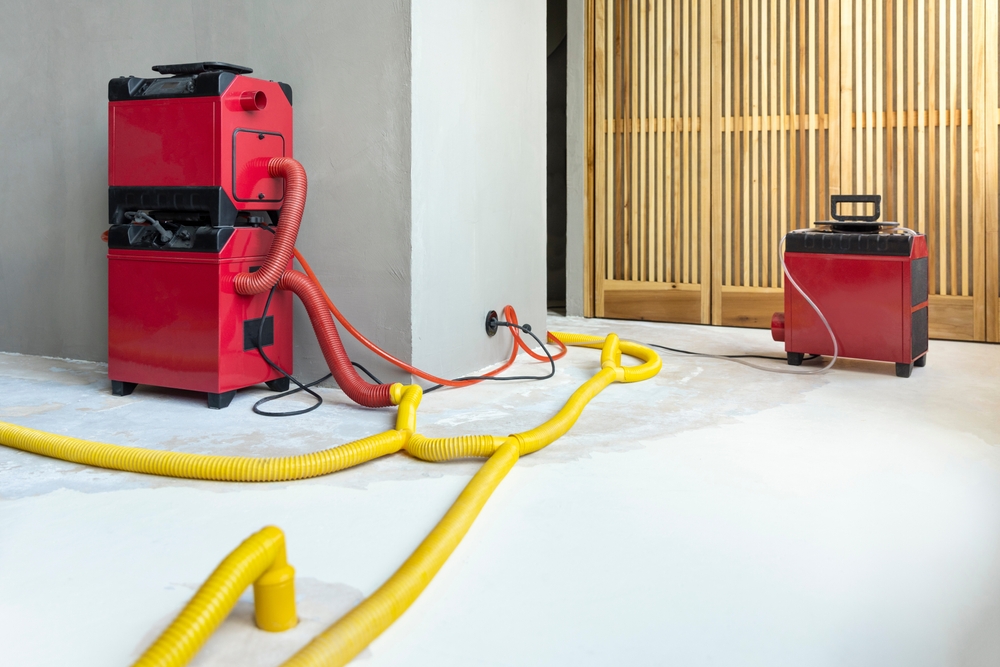
  • Drying and Dehumidifying the Basement: We use professional-grade dehumidifiers and air movers to dry the basement thoroughly, preventing moisture-related issues like mold growth.
  • Cleaning and Sanitizing Surfaces: We clean and sanitize all affected surfaces to eliminate contaminants and bacteria, ensuring a safe environment.
  • Mold Prevention and Remediation: We take proactive steps to prevent mold growth, including using antimicrobial treatments and thoroughly cleaning the affected area.

DIY vs Professional Basement Water Removal

While DIY methods may seem cost-effective, they may not always be the best for flooded basement cleanup.

Pros and Cons of DIY Methods

DIY basement water removal provides immediate response and is cost-effective for minor issues, helping you save money on professional services. However, they will not not be as effective as professional basement water removal services. 

DIY methods are often less effective for severe flooding, as there’s a risk of incomplete drying and hidden damage. They also pose safety risks for individuals without proper training and equipment.

Benefits of Hiring Professionals Like Yeti Restoration

Hiring Yeti Restoration for your basement water removal needs offers several advantages:

  • Expertise and Experience: Our skilled professionals understand the complexities of water damage and know how to address it effectively.
  • Advanced Equipment: Our professional-grade equipment ensures thorough water removal and drying.
  • Comprehensive Cleanup and Restoration Services: We offer complete solutions, from water extraction to mold remediation.
  • Water Emergency Response: Our quick and reliable emergency services help mitigate damage and restore your home.

Preventing Future Basement Water Problems

It is essential to address the root cause of basement water problems to prevent future issues. Regular maintenance and preventative measures can help keep your basement dry and safe.

Follow these regular maintenance tips to prevent basement water problems:

  • Inspect and Repair Foundation Cracks: Regularly check for and repair any cracks in the foundation.
  • Ensure Proper Drainage Around the Home: Make sure your yard slopes away from the house and that drainage systems are working correctly.
  • Install Sump Pumps and Backup Systems: A reliable sump pump system can prevent basement flooding during heavy rains.
  • Regularly Clean Gutters and Downspouts: Keep gutters and downspouts clear to ensure proper water flow away from your home.
Basement Water Removal

Contact Yeti Restoration for Expert Basement Water Removal

Why risk the potential dangers and incomplete cleanup of a flooded basement when you can trust the professionals at Yeti Restoration? We are committed to providing exceptional water damage restoration services in Cincinnati.

Our team is dedicated to ensuring your home is dry, safe, and restored to its original condition. Contact us today for a free consultation or emergency service.

Final Thoughts

Basement water removal is a critical task that requires prompt and effective action. You can protect your home from extensive damage by understanding the causes of basement flooding, taking immediate steps to remove water, and employing professional cleanup techniques.

Trust Yeti Restoration for expert basement water removal and prevention to keep your home dry and safe. We are here to help you through any water emergency and restore your home to its pre-loss condition.

Contact us for all your water damage restoration needs. Stay safe and dry!

Categories
Mold Remediation

How To Effectively Handle Attic Mold Remediation: A Homeowner’s Guide

Dealing with attic mold is often a tedious task for homeowners, but you must address it quickly to prevent further damage and health risks. In this guide, we want to guide homeowners through mold remediation with our effective strategies. From understanding the causes of mold to implementing safe removal techniques, we’ll cover everything you need to know to ensure your home remains a healthy environment. 

Whether you can see visible mold, or you just suspect its presence, this comprehensive guide will help you tackle the challenge confidently!

Understanding Attic Mold

Mold typically grows in environments with high humidity and poor ventilation, and it is often exacerbated by issues like roof leaks, inadequate insulation, or improper airflow. Attic mold — in particular — thrives on organic materials like wood and paper, spreading through airborne spores that grow wildly thanks to the attic’s climate. The early signs of an infestation include musty odors, visible discoloration on surfaces, and potentially adverse health effects like respiratory issues among the people in your home. 

Understanding the way mold operates is essential for effective mold remediation. It allows you to figure out the underlying causes of your mold problems and implement solutions to prevent the mold from coming back. 

By addressing moisture sources and improving ventilation, you can create an environment that is less hospitable to mold growth. This approach can protect the health of your home and even boost your indoor air quality.

Handle Attic Mold Remediation

Preparing for Attic Mold Remediation

Before you dive into attic mold remediation, make sure you’re properly prepared. Taking these steps can keep you safe and boost the effectiveness of the project.

Safety Precautions

When you tackle attic mold, you must prioritize your safety. Wear protective gear to shield yourself from mold spores and cleaning agents. Some of the gear you need includes:

  • Proper Breathing Filtration (N95 respirators)
  • Gloves
  • Goggles

Take the proper precautions to protect your health. If just the mention of these things makes you nervous- Call a Yeti! 

Tools and Materials Needed

To effectively tackle attic mold, gather the following tools and materials:

  • Abrasives (Steel bristle brushes and palm sanders): Use steel-bristle brushes and palm sanders for removing mold off your surfaces.
  • Cleaning Solutions: Opt for mild detergent or specially formulated mold cleaners. Avoid using bleach- It often bleaches the pigments in the mold (just like in your favorite shirt) but does not remove the mold. 
  • HEPA Vacuum: Known as a high-efficiency particulate air vacuum, this tool can remove mold spores from surfaces without spreading them around more.
  • Mold-Specific Cleaning Agents: Choose products that are designed specifically for eradicating mold (The fancy names is Anti-Microbial)  Our Favorite is a botanical anti-microbialt called “Benefect Decon 30” which is natural, made from Thyme extract, and smells amazing. These cleaners can remove mold and inhibit any future growth.

These tools and materials help you efficiently — and safely! — address your attic mold issues.

Step-by-Step Attic Mold Remediation Process

Getting rid of mold requires a meticulous approach to ensure that those pesky spores are gone for good. Follow these steps to effectively eliminate mold from your attic. It takes caution to not spread the spores to unaffected areas of your home. Once again- if this makes you nervous… Call a Yeti! 

Inspection and Assessment

Start your remediation by thoroughly inspecting the attic. Look for visible signs of mold growth like surface discoloration, musty odors, and damp spots. 

Don’t forget to document the extent of the mold infestation. List down the affected areas and the severity of the damage, taking photos if possible. If the mold problem is extensive, please consider seeking professional assistance — such as Yeti Restoration’s mold remediation services — for expert solutions so the mold spores are not spread to unaffected areas. 

Containment 

Isolate the affected area to prevent mold spores from dispersing to other parts of your home. You can seal off the attic using 6mm plastic sheets and Heavy duty vinyl tape. You want to totally seal yourself into the attic by cutting off all airflow to the unaffected areas of your home. 

Cleaning and Removal

Begin the cleaning process by removing mold-infested materials such as insulation, drywall, or wood that cannot be salvaged. These items should be bagged, sealed and cleaned prior to taking them through any uncontaminated areas. If you take shortcuts on this step, you are likely to contaminate any area you bring these items through. Dispose of these materials properly according to local regulations. Scrub hard surfaces with mold-specific cleaning agents, using abrasives to remove mold residue thoroughly. While cleaning, use a HEPA vacuum to capture any remaining mold spores from surfaces and the air.

By following this approach, you can successfully obliterate small mold infestations, restoring a safe and healthy environment within your attic. If the mold is found in multiple places in your attic we recommend calling a Mold Remediation company to help you with this process. The more mold that is present, the more likely it is to spread it to unaffected areas. Mold remediation companies have trained professionals who do this daily and know the proper precautions to take to make sure your home stays safe. 

Preventing Future Attic Mold Growth

To maintain a mold-free attic and protect your home’s integrity, proactive measures and regular maintenance are essential. Follow these preventive strategies to prevent future mold growth.

Moisture Control

Effective moisture management is key to preventing mold in the attic. Ensure proper attic ventilation to promote air circulation and reduce humidity levels. Consider installing vents, exhaust fans, or a ridge vent system to facilitate airflow. Address any roof leaks promptly and inspect for water intrusion points around chimneys, skylights, or plumbing vents. Seal gaps and repair damaged roofing materials to prevent moisture from entering the attic space.

Regular Inspections

Schedule routine attic inspections — ideally twice a year — to detect early signs of mold or moisture problems. Look for discoloration, dampness, or musty odors, which can indicate mold growth. Document any findings and address issues promptly to prevent mold from spreading and causing extensive damage.

For more insights on mold prevention and professional services, visit our article “All Mold is a Signpost,” which emphasizes the importance of early detection and proactive mold management strategies.

By implementing these preventive measures and staying vigilant, homeowners can effectively mitigate the risk of attic mold growth, ensuring a healthier and more resilient home environment for years to come.

Handle Attic Mold Remediation

Final Thoughts

Effective attic mold remediation begins with thorough inspection and assessment, followed by careful containment, cleaning with appropriate agents, and proper disposal of affected materials. Ventilation and moisture control are crucial to prevent mold recurrence. Regular inspections can catch mold early, ensuring timely intervention. Remember, proactive prevention, including maintaining good attic ventilation and promptly addressing leaks, is paramount to safeguarding your home’s integrity. 

For professional attic mold treatment and expert remediation services, contact Yeti Restoration. Our expertise can help you thoroughly remove mold as we provide tailored solutions for your specific needs. By taking these steps and partnering with us, you can maintain a healthy living environment and protect your property from the risks that mold carries.

Categories
Mold Remediation

HEPA, HEPA, Damp Wipe

Everyone has a secret family recipe. Surely. Jessica (the head of Yeti operations) grew up with a Dad who was a successful for-real chef. He knows
more about the perfect meal than most of us have ever learned about anything.

In the mold remediation world, because we’re such fun-loving types, we’ve got a recipe for mold remediation called the “HEPA Sandwich”. You’d love it. As mold experts, we establish containment wherever necessary; before a fully suited remediation professional HEPA vacs the affected surface, damp wipes said surface, and then HEPA vacs again.

Somewhere along the way the secret recipe has been getting a sly adjustment.

In fact, the sandwich has fallen apart altogether – more like an open face, now. This new recipe is now “HEPA, HEPA, Damp Wipe”.

A small change, and possibly insignificant. But the goal is the same – we’re trying to remove (not kill) the mold. The HEPA vac is a negative pressure chamber and it removes loose spores from hard surfaces.

The damp wipe step removes what else you can get off simply from that hard surface before repeating the steps.

In real life, there’s an abrasion step between the two HEPA steps. As long as the moldy hard surface (mold on lumber, for example) is dry, the IICRC S520 recommends that the surface is sanded or otherwise abraded, before the second HEPA vac, and the final damp wipe to collect residual mold spores.

mold

If you’re ever lucky enough to watch mold under a microscope when a person walks past, you’ll see what appears to be all the mold fly away. Actually, that air movement that was imperceptible to you, was a storm in the mold cup, because these spores are light enough to be carried in the air. Easily moved, and fragile. The roots of mold do not go deep on hard surfaces, so they fly away easily. The HEPA vac step sucks them in before you get too close to be moving them around too much.

hepa sandwich

While we recommend this as the first step in every mold remediation, the practical knowledge is that this recipe is most effective on hard surfaces. Sadly, mold will embed roots in porous surfaces like drywall and cloth.

When drywall is affected by mold, we remove it 100% of the time. The stud wall behind that drywall may also be affected but would not need to be removed. That hard surface like lumber can have the HEPA, HEPA, Damp Wipe treatment, and may even be sanded or otherwise abraded to physically remove the spores from this substrate.

Those spores then get the HEPA, HEPA, Damp Wipe treatment again, and get sucked or blown into a HEPA filter forever.

All this to get you back to a mold-neutral indoor environment.

Adapted from the book: Yeti’s Eat Mold for Breakfast, first published 2022

hepa sandwich
Categories
Mold Remediation

PPE For Your House

You know when somebody is cooking bacon because you open the door, and the smell carries the warm air to your nose. As you create negative pressure pulling air into your nasal cavity (stick with me) you draw those molecules towards you and further away from its source.

Mold spores are much smaller than bacon smells.

And because you intuitively know how bacon smells travel, you now know how mold spores travel through your affected building. It’s that easy.

Our goal is to limit the further spread of mold spores in the air (already happening) by forcing that air (producing negative pressure) to carry the spores where we want them into a HEPA filter (a trap).

Typically, we’ll build temporary plastic containment walls inside doorways or openings just outside the mold affected area, with large HEPA filtration devices set-up, sucking air from one side of the plastic walls to the other; forced through the filter.

Mold spores
ppe in your house

As the spores are carried to the HEPA filter, they get stuck.

The air passes through the filter, but the mold spores don’t.

Just in the same way that you wear a mask around a sick person (stopping the sickness getting into your mouth), we establish a containment like a mask for your building (stopping the spores traveling further away from the source). This containment will usually be built with double-sided tape on the walls and ceiling, or magnets in an office building, holding plastic sheets in place with extendable poles, and with equipment passing through the temporary wall to push and pull the air as necessary.

If we can effectively identify the source of the mold, we then physically agitate, sand, scrub, and remove it from the surface. We will attempt to make any loose spores airborne to specifically get them trapped in the air filters – so we can take them out of the area and get you back into your now mold-neutral space.

In fact, a final step in the mold removal process will often be an “air-wash”, where we’ll use a leaf blower over all the walls and ceilings, to lift any spores that may have tried to rest since we cleaned those areas. Knowing the negative pressure is sufficient, all the spores we kick-up will be pulled through the HEPA filters and trapped at the end of the project.

Adapted from the book: Yeti’s Eat Mold For Breakfast, first published 2022

ppe in your house
Categories
Mold Remediation

To Test, or Not to Test? Who Knows?

One family asked us to give them a quote to remove all the walls and flooring in their large and beautiful basement.
They’d been told by a mold inspector that it was necessary. This happens a lot.

In conversation, it turned out that their first inspector also owned a remediation company, and this
was his recommended scope of work. And this happens a lot, too.

The Problem with Dual Services: Testing and Remediation

We duly suggested a local vendor we’ve worked with who tests, but does no remediation, and therefore has no dog in the fight. After testing, inspector #2 essentially recommended a deep clean.

Because there is no state licensing for mold remediation technicians or testing in most states, some remediation companies offer in-house testing before and after their work, and some home inspectors offer testing… and even mold remediation services as well.

This means that anybody can sell their mold removal services to you in our part of the country.

Testing and Remediation

Our Stance at Yeti’s: Integrity Over Profit

Perhaps, by contrast, we Yeti’s don’t own a single mold testing contraption of any kind.

Not because we don’t care to know, but we don’t care to cheat 🙂

We want to avoid a conflict of interest when it comes to mold remediation.

It’s waaaaay too easy to find mold, and it’s pretty easy NOT to find it once we think we’re done. But a disinterested third-party… wow – they might find mold spores when we’re done. And that keeps everybody honest.

Mold Removal Service

When to Consider Testing

Sometimes air quality testing is the right move.

We suggest indoor environmental testing whenever you’re experiencing sickness, and believe it may be related to the mold in your indoor space. We suggest mold testing when there is a LOT of mold, or when we can’t find an obvious source. We also recommend mold testing by a third party when the complexities are such that it would be difficult to guarantee we’d landed the plane without hard data. Lastly, we recommend mold testing when a customer is a higher risk occupant (mold in a nursing home, mold identified in a school facility, hospital, etc).

And in many other mold remediation scenarios, it may be appropriate to press on.

If we can see the source, and the affected space, and no one has a health concern, and the scope of remediation hasn’t gotten away from us, there’s a lot of work we can do for the price of testing. And so we try to apply the common sense principle… what would we tell our Mom to do in this situation? Generally, that steers us well – we like Mom 🙂

Adapted from the book: Yeti’s Eat Mold For Breakfast, first published 2022

Mold Removal Service
Categories
Mold Remediation

PPE For Your Face

Only clean the teeth you want to keep. That’s the best dental advice for kids at bedtime 🙂

Only protect the lungs you want to keep. Surely, this is the best advice for mold professionals.

In reality, most people don’t have a deadly reaction to mold exposure. Clearly some do. But most of us have a “tell”.

James knows when he’s walked into something “big” when he gets a weird pulse feeling behind his eye (oh, that’s very scientific), and a tightness in his chest. Some of the team gets a sense in their throat.

That’s when the Personal Protective Equipment (PPE) comes out.

And sometimes, that’s the time to bring in a third-party air quality professional (see our “professionals” post).

worker getting rid of mold
PPE For Your Face

And while this PPE is to protect the person during mold remediation – get them wearing the right gear, before they do the right stuff – it also stops the spread of mold to unaffected spaces too. E.g. if you walk around in the affected space, then back it into an unaffected space with those tiny spores all over you – that’s not super helpful. So the “space suit” comes off at the containment exit point (known as a critical barrier), when you leave the affected area.

So PPE is for use inside the affected area (inside the containment) but not for use outside the affected area (outside the containment).

As always, with science-y things, there’s an exception – PPE is less important to remove when leaving containment when you have an option to leave directly to the exterior of a building. No one cares if you walk the mold outside!

When we worked in the ballroom-basement of a community center, we identified the best exit path to the outside of the building. This meant clearing a path where the best (least visible to the public) egress hadn’t been used very much. But it was worth it for everybody – we could stay in PPE while removing debris, and the guests to the center wouldn’t see the weird Yetis in “space suits” wandering around looking like they’ve stepped into a nuclear site.

PPE For Your Face

Good PPE will typically include some or all of the following:

Full-face respirator (did you know your eyes let in a LOT of mold spores, sickness, and the like?), Tyvek full body suit, gloves, booties. And these may all need to be taped together!

One residential Yeti mold job had four of our team working for three days. Each person changed their mold remediation suit four times a day (after every morning break, lunch, and afternoon break) – that’s a total of twelve remediation suits per person! They wore the same respirator, but changed the cartridge filters regularly on the face plate, and washed their mask daily, inside and out.

The key is to limit transmission of mold spores from inside the affected area, to outside of that area; including to your car, your lungs, other buildings, and other parts of the same building.

Done well, the mold technician may even HEPA vac themselves and dispose their full suit before leaving the final containment.

And all under negative pressure, inside containment – which is like PPE for a mold-affected building!

Other Related & Helpful 'Mold Remediation' Articles:

HEPA, HEPA, Damp Wipe

We’re trying to remove (not kill) the mold. The HEPA vac is a negative pressure chamber and it removes loose spores from hard surfaces.

PPE For Your House

Our goal is to limit the further spread of mold spores in the air (already happening) by forcing that air (producing negative pressure) to carry the spores where we want them into a HEPA filter (a trap).

To Test, or Not to Test? Who Knows?

We want to avoid a conflict of interest when it comes to mold remediation.

It’s waaaaay too easy to find mold, and it’s pretty easy NOT to find it once we think we’re done.

All Mold is a Signpost

Mold is a sign that there’s a problem.

You know it shouldn’t be there. Maybe the black mold wasn’t there when you moved into the office, or your family bought the house. So what’s causing it?

Categories
Mold Remediation

Mold | Don’t Kill It – Remove It

James is horribly allergic to horses. He had the chance in northern Canada to stand among a field of wild mustangs… which he did. But it took him two days to recover. It seemed worth it at the time.

Today, if James walked into a room with a horse in it, it wouldn’t matter if the horse was alive or dead – he’d still be allergic to it. Our immune response to mold is the same. It doesn’t matter if that mold has been starved of moisture or food, or if it’s alive and well – mold maintains all of its toxins and allergenic properties when it’s present in any form. So the key is removal. That’s why the book of Leviticus tells us to remove the people from the moldy space, remove the mold, take it out of the city, and then rebuild the space. This is the exact formula we still use today at Yeti Restoration.

In fact, the IICRC S520 (industry standards for mold remediation) states that “remediators should not mist or fog… in an attempt to kill mold in lieu of source removal”.

mold
worker getting rid of mold

So you don’t use chemicals? Right. Chemicals are universally water-based; and mold spores are oil-based. It was explained once like pounding a bag of flour with your fist – the mold spores are tiny like the flour in the analogy, and the chemical mist, fog, or spray is like the fist. Not only is a water molecule larger than a mold spore, but it’s a repellent (water to oil), rather than a counteractant.

When the goal is removal, the strategy can’t be to cover-up with Kilz, or generally bleach the area.

In fact, bleach won’t work for what you want to achieve with mold. The efficacy of the bleach is used up too quickly on the very top surface of a substrate, killing whatever it touches on contact, and using up that chemical potency. While this is interesting and helpful on a metal laboratory table, it’s not very helpful for removing mold colonies eating each other on porous materials. That 99.9% efficiency is tested and proven on pre-cleaned metal, not moldy porous surfaces in basements.

The removal of the mold itself is the starting point – and that often requires the removal of the porous materials the mold is growing through (not just on it). But more on that later…!

Adapted from the book: Yeti’s Eat Mold for Breakfast, first published 2022

Categories
Mold Remediation

All Mold is a Signpost

Our amazing office manager, Vicki, kept coming to the Yeti Restoration office early in the morning because she knew (she has special senses) that there was a dog on the loose, and she wanted to help it. Yetis make great pet people.

There were some obvious (to Vicki) signs that the dog was there – and finally she saw it on the security camera,; came in at 3am, caught him, took lots of photos for Amy and the rest of the team, and got him safely to a shelter. True story 🙂

There were signs letting Vicki know there was a problem.

Mold is a sign that there’s a problem.

You know it shouldn’t be there. Maybe the black mold wasn’t there when you moved into the office, or your family bought the house. So what’s causing it?

Think of mold like a mushroom in the forest. It’s a simple organism; needing something to eat, something to drink, and somewhere safe to thrive.

Mold remediation & mitigation

Enter…moisture.

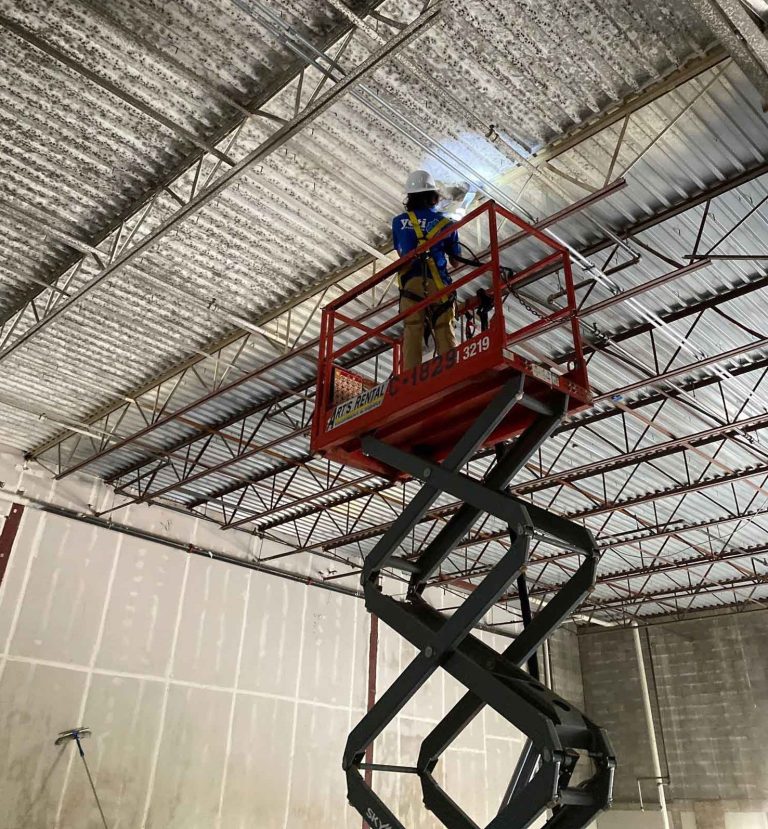
A national retailer we worked for had mold on the ceiling joists of a new store. Everywhere. Could it be that there was water coming in… everywhere? Seems unlikely.

Believe it or not, we see this quite often – high humidity is enough for some molds to drink and thrive. When you consider that our sales leader, Jim, needs more to drink than my youngest son does, who in turn needs less than his friend’s pet rabbit, you can start to imagine that some molds are so small that they can actually drink the humidity in the air.

After a drink, mold just needs something to eat (dirt/ dust is fine), and somewhere safe to thrive. Ceiling joists don’t get touched often, have very little airflow, and tend to be located just above the bright lights in a warm place. So we ended up cleaning every inch of this retailer’s ceiling with dry ice blasting technology; full mold removal, and cleaning of the remains.

If it’s not universal, like the ceiling mentioned above, mold on drywall may be pointing to a water leak or intrusion. So we’ll often remove the drywall in safe containment with negative pressure to expose the problem and get it fixed.

This means that the crack in the foundation can now be seen and fixed.

The high moisture can now be addressed.

Or the plumbing leak, or other concern can be remedied.

With the signpost (affected porous materials) removed, and the space cleaned, the mold can’t grow back like it wants to, giving you a chance to repair the source of the problem.

Note: Drywall with mold is a non-starter. Because the drywall is porous (and covered in paper), affected drywall has to be removed. If you cut through moldy drywall, you’ll see the roots may go all the way through – there’s no cleaning the surface and getting it done. Indeed, when you understand how mold grows, you’ll know it’s happier and stronger on the back of the drywall than the front. Without appropriate remediation, you’re only cleaning the front…

Adapted from the book: Yeti’s Eat Mold For Breakfast, first published 2022

Mold remediation
Categories
Mold Remediation

Green Mold, Red Mold, and Black Mold – Who Cares?

We’re asked almost daily what kind of mold a client has, and if they need mold removal. Many people are kind enough to tell us what kind of mold they have because they found out online. Sometimes, what a homeowner has diagnosed will turn out to be spider poo (spiders poo too!), or a tiny insect nest, or a rusty nail, or a water stain.

In truth, they don’t know.

And even Yetis can’t tell specific mold types by looking with their eyes.

Without a great deal of knowledge, training (usually a degree), and an actual microscope, you simply can’t tell what kind of mold you have growing in your grandma’s wet basement.

And in most (possibly all, but let’s play it safe) cases, it simply doesn’t matter what type of mold you have at the office. The process for mold removal is the same for any type of mold. The critical barriers, the negative pressure strategy, and the agitation/ mold removal process remain broadly unchanged.

Please hear us right – it matters if you have it. But probably it doesn’t matter what you call it. The volume of mold and occupancy type are the key metrics to determine strategy. Let us explain!

molds

Mold Remediation in Challenging Environments

Mold removal Cincinnati

There’s mold everywhere, and on everything. It’s on you now, and it’s on your tree , car and children.

Because we can’t achieve a mold-free state, the goal of a successful mold remediation project is to achieve the same mold spore count inside as can be found outside. And that’s a moving target, in just the same way as you have more or less pollen or smog in the air on any given day.

The outside environment is known as “Condition One”. We want your indoor air quality to be as close to the outside air makeup as possible – or better. It’s good to remember that any of the “bad molds” are either a) safe in their Condition One levels, or b) non-existent in the Condition One environment, and therefore can be removed during your mold remediation project.

Like anything science-y, there’s a few times these conditions don’t translate into reality.

One quick example – when we were wrapping up a four-story mold job at a federal facility in Ohio, the outside air temperature was so low that no mold (impossible) was captured in the outside (Condition One) control sample. This meant we could only fail our clearance test, because the indoors was a heated space, and spores (while not high in normal testing conditions) were higher than the outside comparable conditions on the day.

So the volume of mold is important, and occupancy type. A nursing home we worked in had so much mold in two client’s rooms that when we touched the wallpaper, it fell off!! The mold had grown so thick behind the wallpaper that the glue was either eaten away or otherwise rendered useless, and the wallpaper was hanging on the wall by some invisible pressure miracle. Naturally, the concern level rises in a nursing home with indoor air quality concerns, or a school, versus a moldy attic or your shed. But the protocol may not change.

In this nursing home environment, we applied the same general strategy that we do in a basement or kitchen mold removal; safely remove the occupants, contain the affected area, remove the mold/ affected porous materials, and limit future growth.

There’s several consistent right steps to perform a successful mold remediation, and it’s usually a blend of science and art – or wisdom 🙂

Adapted from the book: Yeti’s Eat Mold for Breakfast, first published 2022

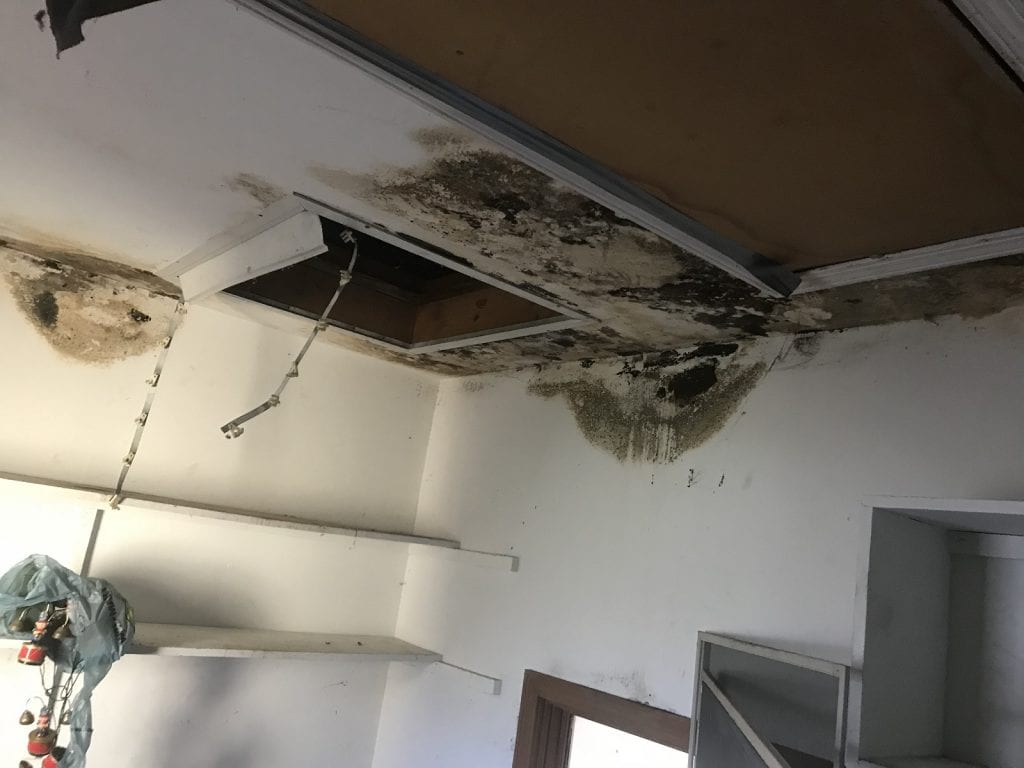
Mold Remediation on Ceiling in Cincinnati